


Introduction
As data centers move from 10G to 40G, 100G, and beyond, cabling density becomes a practical limit on performance, airflow, and maintenance. MPO breakout harness cables address that problem by converting a single multi-fiber MPO connection into multiple duplex links, allowing higher port density without the clutter of large duplex cable bundles. This article explains how MPO breakout harness cables work, where they fit in modern network architectures, and why they can simplify deployment while improving space utilization, scalability, and day-to-day manageability inside high-speed server and switch environments.
Why MPO Breakout Harness Cable Matters
I’ve spent enough time in server rooms to know that upgrading network speeds isn’t just about swapping switches; it’s about managing the physical chaos. When we jump from legacy 10G architectures to 40G, 100G, or even 400G environments, traditional duplex cabling quickly becomes a massive bottleneck. You simply run out of physical space on the patch panels. That is exactly where an MPO Breakout Cable steps in to save our sanity and our rack space. By consolidating multiple optical paths into a single trunk, we drastically reduce cable bulk, improve airflow, and make the entire infrastructure far more manageable.
Definition and Baseline Specifications
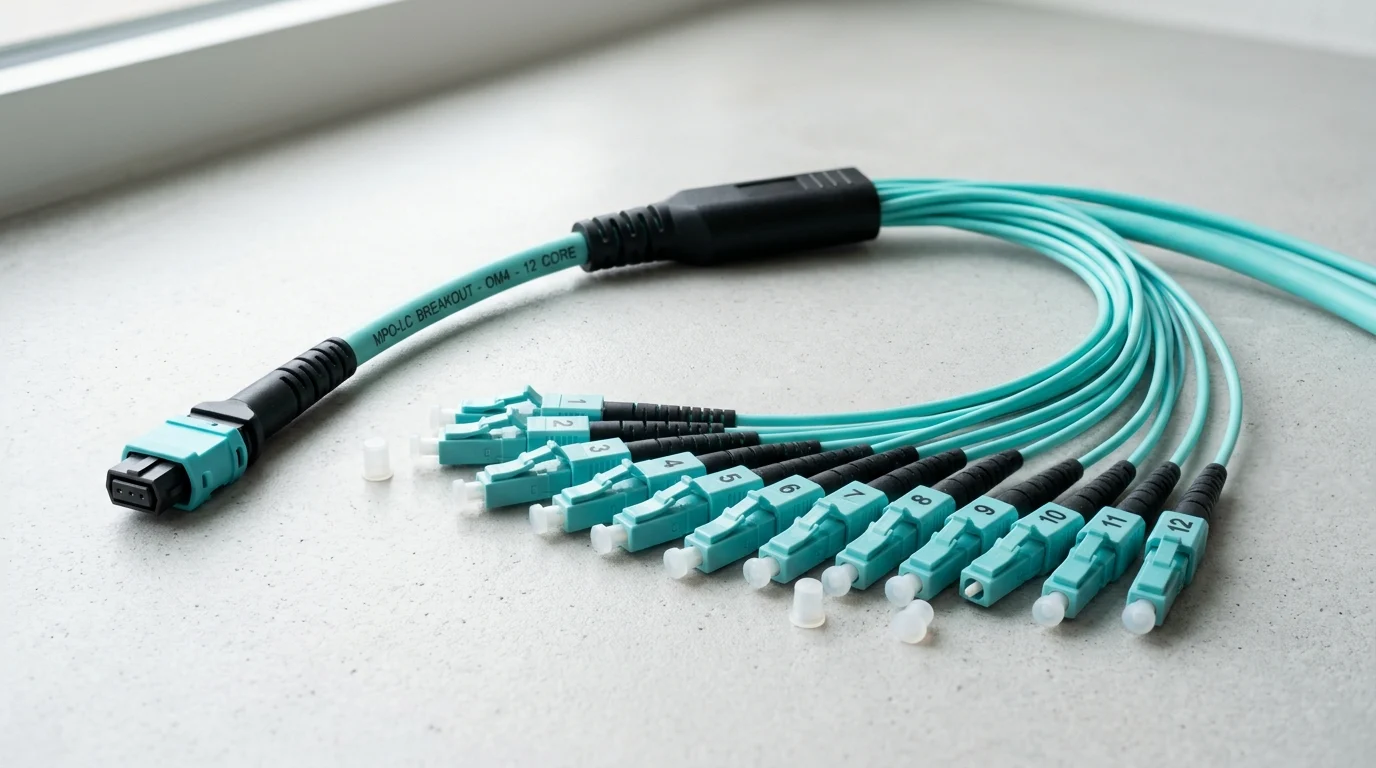
At its core, this harness takes a single multi-fiber push-on (MPO) connector—usually packing 8, 12, or 24 fibers—and splits it into multiple duplex connectors, typically LC or sometimes SC. If you are looking at baseline specifications, insertion loss is the metric I always check first because it directly impacts your optical power budget. Standard MPO connectors generally sit around 0.75 dB of insertion loss. However, if you are pushing high data rates over long distances or through multiple cross-connects, you will want to specify ultra-low loss connectors, which are factory-tested to deliver 0.35 dB or better. Return loss is equally important, typically needing to exceed 20 dB for multimode and 60 dB for single-mode to prevent signal reflection issues.
Core Data Center Use Cases
In my experience, the most common use case for these harnesses is within spine-and-leaf network architectures where port density is absolutely critical. For instance, you might break out a 40G QSFP+ port on a core spine switch into four individual 10G SFP+ ports distributed across top-of-rack leaf switches. It is the backbone of a modern Data Center Connectivity Solution, allowing us to maximize the utilization of expensive, high-capacity switch ports without running dozens of individual duplex strands across the facility floor. We also see heavy adoption in storage area networks (SANs) and edge computing nodes where space is at an absolute premium.
How to Compare MPO Breakout Harness Cable Options
When evaluating different harness options for a facility, I’ve learned the hard way that not all cables are created equal. You must look past the basic pinouts and connector types to ensure the cable actually fits your specific network environment, optical budget, and long-term scaling plans. Buying the cheapest option usually leads to costly link failures down the line.
Key Comparison Criteria
The first detail to nail down is the fiber grade and polarity. If you are running multimode optics, you will typically choose between OM3, OM4, or OM5 glass. For single-mode applications, OS2 is the universal standard. Polarity—whether Type A, Type B, or Type C—dictates how the transmit (Tx) and receive (Rx) signals align across the link. Getting this wrong means your network link simply will not come up, no matter how good the transceivers are. Here is a quick breakdown of how fiber grades impact your reach when using an MPO to LC Harness Cable:
| Fiber Grade | Core / Cladding Size | Operating Wavelength | Max Reach (100G SR4/DR) |
|---|---|---|---|
| OM3 (Multimode) | 50/125 µm | 850 nm | Up to 70 meters |
| OM4 (Multimode) | 50/125 µm | 850 nm | Up to 100 meters |
| OM5 (Multimode) | 50/125 µm | 850-953 nm | Up to 150 meters |
| OS2 (Single-mode) | 9/125 µm | 1310/1550 nm | 10 km to 40 km+ |
Technical Choices That Affect Performance and Fit
Beyond the glass itself, the physical construction of the outer jacket heavily influences performance and fit within your trays. You need to choose the right fire rating—Plenum (OFNP), Riser (OFNR), or Low Smoke Zero Halogen (LSZH)—based on your local municipal building codes and facility safety standards. I also pay close attention to the outer diameter (OD) of the trunk section. A micro-core cable with a 3.0mm OD significantly improves airflow and cooling efficiency in dense racks compared to bulkier 4.5mm or 6.0mm legacy designs. When you multiply a 1.5mm difference by hundreds of cables in a single rack, the impact on your HVAC energy consumption is measurable.
How to Choose and Deploy MPO Breakout Harness Cable
Getting the right cables ordered is only half the battle. If we do not deploy them thoughtfully, we end up creating an expensive, tangled mess that blocks cooling fans, restricts access to hot-swappable components, and makes future troubleshooting an absolute nightmare.
Selection and Installation Steps
My first rule for installation is to calculate your cable lengths precisely. I aim for no more than 10% to 15% slack; any more than that, and you are just stuffing excess cable into management arms, which restricts airflow. Next, verify your transceiver requirements before pulling the wire. If you are using Base-8 transceivers (like QSFP-SR4), deploying a Base-12 High Density Fiber Cable means 33% of your expensive glass goes completely unused, sitting dark in the tray. Finally, route the cables using proper management trays to respect the minimum bend radius. Even with modern bend-insensitive fiber, pushing past the typical 7.5mm to 15mm radius threshold will cause macro-bending losses that degrade your signal quality.
Decision Guidance and Best Practices
Before you plug anything in, inspect and clean every single end-face using a dedicated digital inspection probe.
Key Takeaways
- The most important conclusions and rationale for MPO Breakout Harness Cable
- Specs, compliance, and risk checks worth validating before you commit
- Practical next steps and caveats readers can apply immediately
Frequently Asked Questions
What is an MPO breakout harness cable used for?
It splits one MPO connector into multiple duplex LC or SC links, letting a 40G/100G port connect to lower-speed ports while reducing cable bulk and saving rack space.
How do I choose between OM3, OM4, OM5, and OS2?
Match fiber to reach and optics: OM3 for shorter multimode links, OM4 for up to 100m at 100G SR4, OM5 for extended multimode options, and OS2 for long-distance single-mode runs.
Why is MPO polarity important?
Polarity controls Tx/Rx alignment across the link. If Type A, B, or C is specified incorrectly, the connection may not come up even with compatible transceivers.
What insertion loss should I look for in an MPO breakout harness?
Standard MPO connectors are around 0.75 dB, but for higher-speed links or multiple cross-connects, choose ultra-low-loss assemblies around 0.35 dB to protect optical budget.
Can Newsunn help with custom MPO to LC breakout cable selection?
Yes. On newsunn.com, you can source MPO breakout harness options by connector type, fiber grade, polarity, and application to match data center, SAN, or edge deployments.