

Proper MPO BREAKOUT HARNESS CABLE installation demands careful workspace preparation, the right fiber optic tools, and precise cable handling. Each step ensures reliable network performance and compatibility with equipment like the MPO Patch Panel. Immediate benefits include:
- High-density and space efficiency for data centers
- Simplified cabling infrastructure and enhanced cable management
- Improved network performance through lower insertion loss and higher signal integrity
- Scalability to support future upgrades and advanced topologies
Following these best practices helps reduce errors and supports long-term network dependability.
Key Takeaways
- MPO breakout harness cables connect multiple fibers in one cable to individual connectors, saving space and simplifying network setups.
- Proper preparation includes checking cable compatibility, planning connection points, and using the right tools like fiber strippers and cleaning kits.
- Handle cables carefully by maintaining the correct bend radius and keeping connectors clean to avoid damage and signal loss.
- Follow step-by-step installation: inspect cables, route them properly, align connectors correctly, and secure cables with ties and labels.
- Test the installation with visual inspections and performance tests like insertion loss and continuity to ensure reliable network operation.
- Troubleshoot common issues by cleaning connectors, checking polarity, and reseating connectors to fix alignment or contamination problems.
- Regular maintenance with scheduled inspections and cleaning extends cable life and keeps network performance high.
- Use a detailed installation checklist and document all steps to reduce errors, support future upgrades, and maintain network reliability.
MPO BREAKOUT HARNESS CABLE Overview
What Is an MPO BREAKOUT HARNESS CABLE
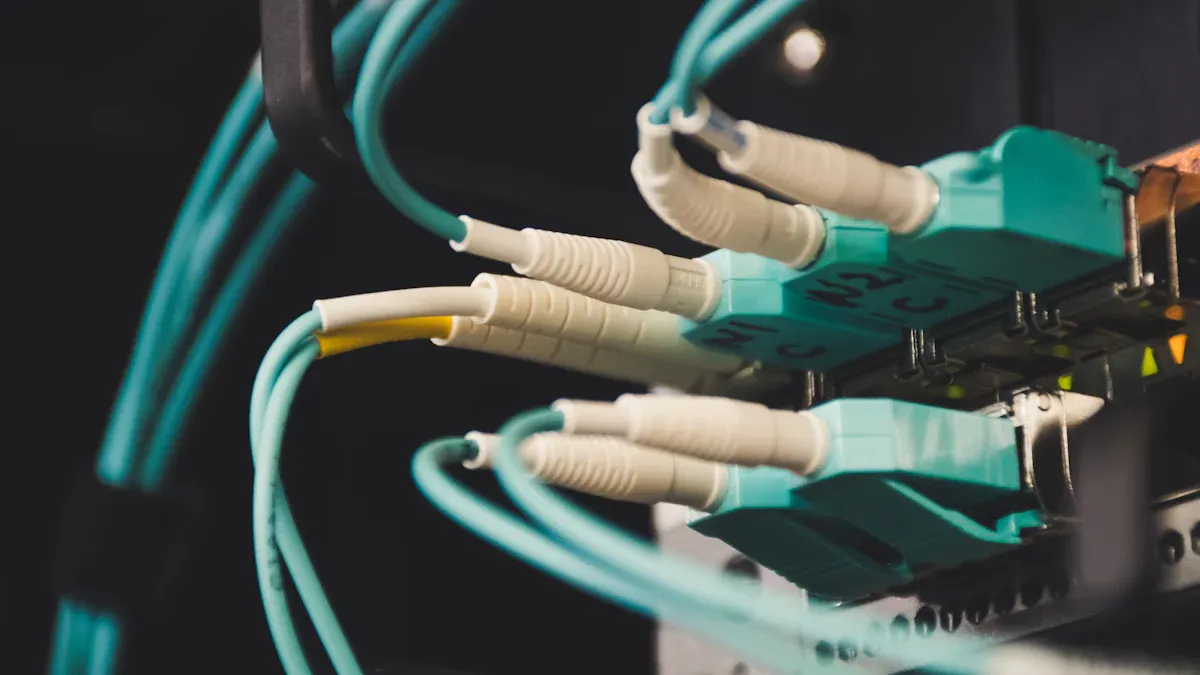
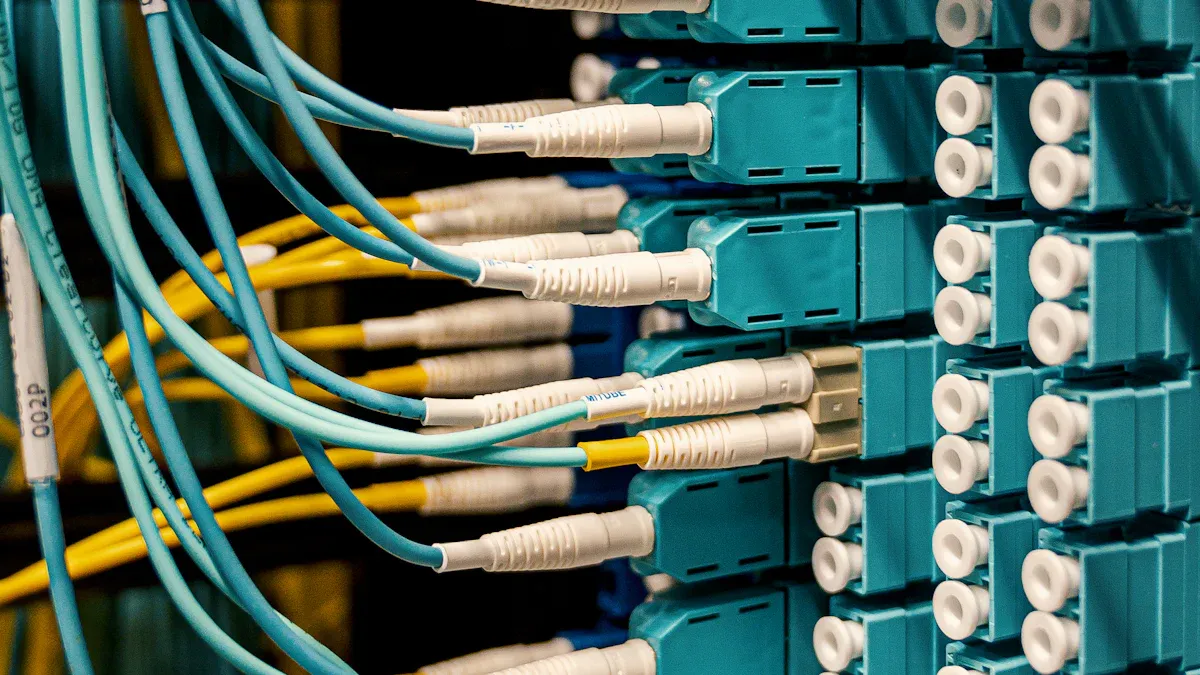
An MPO breakout harness cable serves as a critical component in modern fiber optic networks. This cable features an MPO connector on one end, which houses multiple fibers within a single interface. The opposite end splits into several individual connectors, such as LC, SC, FC, or ST, each terminating a single fiber. This design enables the efficient distribution of data signals from a single source to multiple destinations. The modular structure of the cable supports easy installation and management, especially in high-density networking environments. Fiber counts can range from 8 to 144, and the cables often include specialized jackets and polarity options to suit various applications. The connectors comply with industry standards, ensuring precise alignment and reliable performance.
Key Features
- MPO connector on one end, multiple individual connectors (LC, SC, FC, or ST) on the other
- Supports a wide range of fiber counts, from 8 up to 144
- Modular design for easy installation and management
- High-quality ferrules and precise alignment mechanisms
- Available with different jacket materials and polarity configurations
- Complies with IEC-61754-7 and TIA-604-5 standards
Typical Applications
MPO breakout harness cables play a vital role in data centers, enterprise networks, and telecommunications facilities. They enable direct interconnection between MPO trunk cables and equipment with discrete connectors, such as switches, servers, and patch panels. These cables support high-speed connections, including 10G, 40G, and 100G, and facilitate network upgrades by allowing seamless migration to higher data rates. Their use extends to modular and scalable network environments, where efficient cable management and rapid deployment are essential.
Benefits of MPO BREAKOUT HARNESS CABLE
Space Efficiency
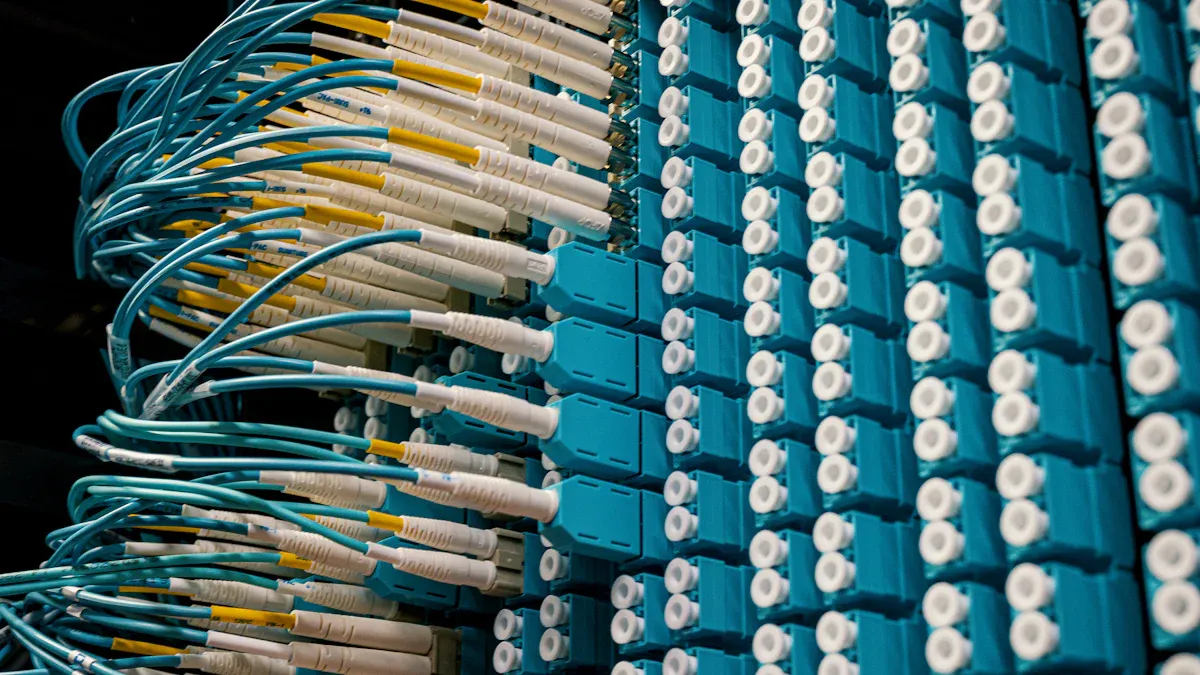
MPO breakout harness cables deliver significant space savings in network installations. For example, a financial data center project that upgraded to FC-to-MPO breakout cables achieved a 75% reduction in cabinet space. A single MPO jumper can replace multiple single-core jumpers, reducing wiring volume in cabinets by up to 90%. MPO patch panels can support up to 576 cores in a 1U space, which is six times the density of traditional LC cabling. This high-density capability proves essential in space-constrained environments.
High-Speed Connectivity
These cables support short-distance, high-speed connections, such as 10G-40G and 25G-100G. The MPO connector aggregates multiple fibers, enabling rapid data transmission and efficient bandwidth utilization. By connecting multi-fiber trunk cables to equipment with discrete connectors, the cables facilitate network flexibility and future upgrades. This capability ensures that data centers can meet growing bandwidth demands without extensive infrastructure changes.
Simplified Cable Management
MPO breakout harness cables simplify cable management by reducing clutter and minimizing the need for complex patch panels in short-range applications.
Their modular design allows for direct port-to-port connectivity, making installation and maintenance straightforward. The cables support modularity and scalability, allowing network administrators to reconfigure or expand systems with minimal disruption. Protective jacketing and fire-resistant materials further enhance their suitability for demanding environments.
Preparation for MPO BREAKOUT HARNESS CABLE Installation
Assessing Network Environment
Compatibility Considerations
A successful installation begins with a thorough assessment of the network environment. Technicians must evaluate several factors to ensure the selected cable matches the system’s requirements. The type of fiber—single-mode for long distances or multimode for shorter runs—directly impacts performance. Connector types, such as LC, SC, or MPO, must align with the density and speed needs of the network. Fiber count also plays a crucial role; common options include 8, 12, or 24 fibers, which should match the number of required connections. Cable armor provides protection in exposed areas, while non-armored cables offer flexibility indoors. Fire ratings, such as plenum or riser, ensure compliance with building codes. Cable diameter affects routing, with thinner cables fitting better in tight spaces. Compatibility with existing equipment and adherence to industry standards guarantee seamless integration.
Note: Always verify that the chosen MPO BREAKOUT HARNESS CABLE meets both technical and safety standards before installation.
Identifying Connection Points
Identifying all connection points in advance streamlines the installation process. Technicians should map out where the cable will connect to patch panels, switches, or transceivers. This step helps prevent routing errors and ensures the cable length is sufficient. Clear identification of these points also supports efficient troubleshooting and future upgrades.
Essential Tools and Accessories for MPO BREAKOUT HARNESS CABLE
Fiber Strippers and Cleavers
Fiber strippers remove the protective coating from optical fibers without damaging the core. Cleavers provide precise, clean cuts, which are essential for optimal signal transmission. High-quality tools reduce the risk of fiber breakage and signal loss.
Crimping Pliers and UV Glue/Epoxy
Crimping pliers secure connectors to the fiber ends, ensuring a stable mechanical connection. UV glue or epoxy bonds the fiber to the connector, providing additional strength and durability. Proper use of these tools maintains the integrity of each connection.
Cleaning Tools and Solutions
Cleanliness is critical in fiber optic installations. Specialized cleaning tools, such as lint-free wipes and isopropyl alcohol, remove dust and contaminants from connectors. MPO connectors, with their larger surface area, require extra attention to prevent performance issues.
Cable Management Accessories
Cable ties, split nuts, and labeling tags help organize and secure cables within racks and enclosures. Good cable management prevents tangling, reduces stress on fibers, and simplifies maintenance.
Safety Precautions
Handling Fiber Optic Cables
Technicians must handle fiber optic cables with care to avoid damage. They should maintain the recommended bend radius, typically 20 to 30 times the cable diameter, and avoid exceeding tension limits. Antistatic gloves and grounded tools protect both the cable and the installer. Plenum-rated cables reduce smoke and flame spread, meeting fire safety requirements in air-handling spaces.
Workspace Preparation
A clean, organized workspace minimizes the risk of contamination and accidents. Marking work areas with warning signs and using proper lighting improves safety. Compliance with international and local standards, such as IEC 60794 and TIA-568.3-D, ensures quality and reliability throughout the installation process.
Step-by-Step MPO BREAKOUT HARNESS CABLE Installation Guide
Unpacking and Inspecting the Cable
Checking for Damage
Technicians begin the installation process by carefully unpacking the MPO BREAKOUT HARNESS CABLE. They inspect the cable for any visible signs of damage, such as crushed jackets, bent connectors, or exposed fibers. Even minor abrasions can compromise signal integrity. A thorough visual inspection helps prevent future connectivity issues and ensures the cable meets quality standards.
Tip: Use a fiber microscope to examine connector end faces for scratches, chips, or contamination. Clean connectors before proceeding if any debris is present.
Verifying Specifications
After confirming the cable is undamaged, technicians verify that the cable matches the required specifications. They check the fiber type, connector configuration, fiber count, and jacket rating against project documentation. Matching these details ensures compatibility with network equipment and compliance with safety codes. Technicians also confirm the cable length is sufficient for the planned route, reducing the risk of tension or stretching during installation.
Cable Routing and Handling
Optimizing Cable Pathways
Proper cable routing plays a critical role in maintaining network performance. Technicians plan the cable path in advance, considering rack layouts, connection points, and environmental factors. They avoid sharp bends, tight spaces, and areas with high foot traffic. Using cable trays, guides, and ties helps organize cables and prevents tangling or accidental damage.
Best practices for routing and handling MPO breakout harness cables include:
- Conduct pre-installation planning by examining the site and validating materials.
- Use standardized installation procedures and checklists to minimize errors.
- Manage cables with ties, labels, and routing guides to prevent physical damage.
- Employ quality tools and pre-terminated assemblies for reliable connections.
- Maintain connector cleanliness with regular inspections and cleaning.
- Use alignment pins or guides during connector mating for precise fiber alignment.
- Perform regular testing, such as OTDR and insertion loss measurements, to verify signal integrity.
- Control environmental factors by working in clean areas and protecting cables from moisture and extreme temperatures.
- Provide training and certification for installation personnel.
- Document all installation steps for future maintenance and troubleshooting.
Minimizing Bend Radius and Stress
Maintaining the proper bend radius is essential for fiber optic cable health. Technicians follow manufacturer guidelines, keeping bends gentle and avoiding kinks. Excessive bending or pulling can cause microfractures in the fiber, leading to signal loss or complete failure. They secure cables loosely with ties, ensuring no pressure points form along the route.
Note: Most manufacturers recommend a minimum bend radius of 20 to 30 times the cable diameter. Exceeding this limit increases the risk of mechanical stress and signal degradation.
Technicians also monitor for signs of moisture ingress, heat damage, or mechanical stress during installation. Routine cleaning and scheduled checks help detect early signs of degradation, especially in mission-critical networks.
Connector Orientation and Alignment
Understanding MPO Polarity
Correct connector orientation and polarity ensure proper data transmission. MPO connectors feature a non-symmetrical face with a "key" extrusion on one side. This key prevents reverse polarity connections and guarantees correct fiber alignment. For 8, 12, and 24 fiber connectors, the key sits centered; for 16 or 32 fibers, the key is positioned on the left.
Polarity types define how fibers align between connectors:
- Type A (straight-through): Key Up to Key Down, maintaining fiber position.
- Type B (inverted): Key Up to Key Up, swapping fiber positions.
- Type C (twisted pair): Flips adjacent fiber pairs, used in duplex scenarios.
Proper polarity selection prevents signal loss and connectivity issues. Factory-tested pre-terminated cables help ensure correct polarity and reduce installation errors.
Aligning Connectors Correctly
Technicians align connectors using the key and alignment pins. Male connectors have pins, while female connectors have guide holes. These features guarantee precise fiber alignment during mating. Technicians use polarity testers and maintain detailed labeling and documentation for easier troubleshooting and maintenance.
- MTP/MPO polarity ensures correct fiber arrangement for reliable data transmission.
- Regular cleaning and OTDR testing help maintain system integrity and detect polarity or alignment issues.
- Detailed labeling and documentation support efficient maintenance and future upgrades.
Tip: Always inspect connectors for cleanliness before mating. Dust or debris can cause insertion loss and degrade network performance.
Connecting MPO BREAKOUT HARNESS CABLE to Equipment
Attaching to Patch Panels and Chassis Inserts
Technicians begin by identifying the correct patch panel or chassis insert for the installation. They select the appropriate MPO harness cable, ensuring the connector type matches the panel’s requirements. Factory pre-terminated and tested cables provide reliability and reduce installation time. The plug-and-play design allows for quick deployment, minimizing the need for field termination.
When attaching the cable, technicians align the male or female MPO connectors using the pins and guide grooves. This alignment ensures proper mating and maintains signal integrity. Polarity must be checked to guarantee correct fiber alignment. Many installations use MPO cassettes or fiber adapter panels. These components simplify the transition from multi-fiber trunks to individual duplex connectors, creating organized and efficient connections.
Tip: Always verify that the patch panel or chassis insert complies with industry standards. High-quality components help guarantee long-term system reliability.
Technicians gently insert the MPO connector into the adapter port until it clicks into place. They avoid excessive force, which can damage the connector or the panel. After securing the connection, they inspect the interface for proper seating and cleanliness.
Connecting to Transceivers
Connecting the MPO breakout harness cable to transceivers requires attention to detail. Technicians first confirm the transceiver type and ensure compatibility with the cable’s connector. They clean the connector end face using lint-free wipes and approved cleaning solutions. Cleanliness prevents insertion loss and maintains optimal performance.
The technician aligns the breakout connectors—such as LC, SC, or other types—with the corresponding transceiver ports. Each connector must seat firmly without excessive pressure. Proper orientation prevents misalignment and potential damage. After connecting, the technician checks for a secure fit and verifies that the cable does not strain the transceiver port.
Note: Using factory-terminated harness cables reduces installation errors and ensures consistent performance across all connections.
Securing and Labeling MPO BREAKOUT HARNESS CABLE
Using Split Nuts and Cable Ties
Securing the MPO breakout harness cable protects it from accidental movement and physical stress. Technicians use split nuts and cable ties to anchor the cable within racks or enclosures. Split nuts provide a stable grip without compressing the cable jacket. Cable ties organize the cable runs, preventing tangling and reducing the risk of damage.
A well-secured cable maintains the recommended bend radius and avoids sharp bends. Technicians space cable ties evenly and avoid overtightening, which can deform the cable and affect performance. Organized cable management supports airflow and simplifies future maintenance.
- Use split nuts to anchor cables at entry and exit points.
- Apply cable ties at regular intervals along the cable path.
- Ensure all fasteners are snug but not overly tight.
Labeling for Identification
Clear labeling is essential for efficient network management. Technicians attach durable tags or labels to both ends of the MPO breakout harness cable. Each label includes information such as the cable ID, destination port, and installation date. Consistent labeling practices help technicians identify connections quickly during troubleshooting or upgrades.
Callout: Proper labeling reduces downtime and prevents accidental disconnections during maintenance.
Technicians use standardized labeling formats and update network documentation after installation. Accurate records support long-term reliability and simplify future changes to the network infrastructure.
Testing and Verifying MPO BREAKOUT HARNESS CABLE Installation
Visual Inspection
Checking Connector Cleanliness
Technicians begin the verification process by inspecting each connector for cleanliness. They use a fiber microscope to examine the end face of every MPO connector. This inspection checks for scratches, dust, water droplets, oil stains, or any visible damage. Only connectors that meet A-level standards for polishing and cleanliness should proceed to the next step. Even a small particle can cause significant signal loss or reflection. Regular cleaning with lint-free wipes and approved solutions ensures optimal performance.
Tip: Always inspect and clean connectors before mating. Clean connectors help prevent network failures and reduce troubleshooting time.
Inspecting Cable Pathways
After checking the connectors, technicians review the cable pathways. They look for sharp bends, pinched sections, or signs of physical stress. Proper routing avoids excessive bending and maintains the recommended bend radius. Technicians confirm that cable ties and split nuts secure the cables without compressing the jacket. They also verify that cables remain free from obstructions and environmental hazards. A clear and organized pathway supports long-term reliability.
Performance Testing
Insertion Loss Testing
Insertion loss testing measures the amount of signal lost as light passes through the cable. Technicians use specialized equipment to record this value for each fiber. Industry standards require insertion loss to remain below specific thresholds, usually less than 0.35 dB for single-mode and 0.5 dB for multimode fibers. Low insertion loss indicates a high-quality connection. This test also helps identify issues such as poor connector mating or contamination.
Continuity Testing
Continuity testing checks for uninterrupted signal flow from one end of the cable to the other. Technicians use light sources and power meters to verify that each fiber transmits light correctly. This test confirms that no breaks or severe bends exist in the cable. Polarity testing also takes place during this phase to ensure correct fiber mapping. Proper polarity prevents data transmission errors and supports network compatibility.
Callout: Standard performance testing procedures include end face inspection, polarity verification, and measurement of insertion loss and return loss. These steps ensure the cable meets quality and performance standards before deployment.
Troubleshooting Installation Issues
Common Problems
Technicians often encounter several common issues during installation:
- Alignment problems between connectors
- Contamination from dust or oil
- Improper handling leading to physical damage
- Incorrect polarity or fiber mapping
Visual inspection with a fiber microscope helps detect contamination or scratches. Technicians also check for misalignment and ensure connectors seat properly.
Quick Fixes
To resolve these issues, technicians follow a systematic approach:
- Inspect connectors for contamination or defects.
- Clean connectors using dry or wet cleaning methods.
- Reseat connectors to correct alignment.
- Use alignment tools, such as pins or guides, for precise mating.
- Perform OTDR testing to detect faults or degradation.
- Document all steps and update maintenance records.
Routine inspection and testing allow early detection of wear or damage. Proper handling, storage, and cable management prevent most installation issues. Training and certification programs improve technician competence and reduce rework.
Maintenance and Best Practices for MPO BREAKOUT HARNESS CABLE
Routine Inspection
Scheduled Checks
Technicians maintain network reliability by performing scheduled inspections. They follow a systematic approach to detect issues early and prevent costly downtime.
- Inspect connectors regularly using fiber scopes to identify contamination or physical damage.
- Verify cable alignment with specialized tools and pins to reduce insertion loss.
- Re-seat connectors gently if instability or misalignment occurs.
- Conduct Optical Time Domain Reflectometer (OTDR) tests to locate anomalies such as polarity mismatches or signal degradation.
- Review cable management, ensuring ties and labels remain secure and organized.
Routine checks help technicians address problems before they affect network performance.
Cleaning Procedures
Cleanliness remains critical in fiber optic maintenance. Technicians use optical-grade solvents and lint-free wipes to clean connector end faces. They always keep dust caps on connectors when not in use, preventing dust and debris from settling. Handling connectors by their housing avoids transferring oils and dirt from hands. Technicians maintain clean workspaces, using anti-static mats and air purifiers to minimize contamination. Regular cleaning preserves signal integrity and extends cable lifespan.
Tip: Proper cleaning techniques reduce insertion loss and prevent costly troubleshooting.
Handling and Storage
Proper Storage Techniques
Technicians store cables in clean, controlled environments. They use protective covers to shield connectors from dust and debris. Cables remain coiled loosely to avoid kinks and stress. Storage areas feature stable temperatures and low humidity, reducing the risk of moisture damage. Technicians label cables clearly for easy identification during future maintenance or upgrades.
- Keep dust caps on connectors at all times when cables are not in use.
- Store cables in designated areas with protective covers.
- Avoid stacking heavy objects on cables to prevent deformation.
- Maintain a clean environment to minimize exposure to contaminants.
Avoiding Environmental Hazards
Environmental hazards can shorten cable lifespan. Technicians avoid placing cables near sources of heat, moisture, or electromagnetic interference. They plan installations to minimize handling errors and physical stress. Proper cable management, including the use of ties and routing guides, prevents tangling and damage. Effective management also improves airflow and cooling in high-density setups, supporting long-term performance.
Callout: Neatly arranged cables reduce signal attenuation and simplify maintenance.
Upgrading and Replacing MPO BREAKOUT HARNESS CABLE
Signs of Wear
Technicians monitor cables for signs of wear. Common indicators include visible abrasions, bent connectors, and degraded signal performance. Increased insertion loss or frequent connection instability may signal internal damage. Regular inspections help technicians identify cables that require replacement before failures occur.
Replacement Guidelines
Replacement follows a structured process. Technicians select factory-tested cables that match network specifications. They verify compatibility with existing equipment and ensure proper polarity management. After installation, technicians perform post-installation testing to confirm performance. Documentation updates support future maintenance and upgrades. Regular training ensures technicians follow best practices during replacement procedures.
Troubleshooting Common MPO BREAKOUT HARNESS CABLE Installation Challenges
Connector Mismatch
Identifying Polarity Issues
Connector mismatches often occur due to polarity confusion. Technicians encounter two main MPO adapter types: Type A (straight-through, key up to key down) and Type B (key up to key up, which swaps fiber positions). Mixing these types leads to fiber position mismatches and disrupts signal flow. MPO APC connectors require precise angle alignment, and misalignment of these angled ferrules causes connection problems. Inconsistent implementation of MPO standards by different manufacturers adds to the confusion. Cleaning and inspection challenges, especially around pins and holes, further complicate proper alignment.
Tip: Always verify the adapter type and connector orientation before installation. Use a polarity tester to confirm correct fiber mapping.
Resolving Compatibility Problems
Compatibility problems arise when technicians use components from different manufacturers or mix connector types. Variations in keying, ferrule angles, and pin configurations can prevent proper mating. To resolve these issues, technicians should:
- Check documentation for each component’s polarity and keying.
- Use only compatible connectors and adapters within the same link.
- Inspect connectors for contamination and clean them thoroughly.
- Standardize on a single manufacturer or product line when possible.
Clear labeling and detailed records help prevent future compatibility issues.
Signal Loss or Performance Degradation
Diagnosing Causes
Signal loss and performance degradation stem from several sources:
- Contamination and dirt on connector end faces block or misalign the light path, causing insertion and return loss.
- Misalignment of connectors results from poor-quality connectors or incorrect mating.
- Polarity mismatches reduce data rates and increase error rates.
- Poor connector quality, including substandard or counterfeit parts, increases the risk of misalignment.
- Improper handling introduces oils and debris onto fiber surfaces.
- Environmental factors, such as electromagnetic interference or physical damage, reduce network efficiency.
Technicians use OTDR diagnostics and visual inspection to pinpoint the root cause.
Solutions and Preventive Measures
To minimize signal loss, technicians should:
- Keep dust caps on connectors when not in use.
- Handle connectors by their housing to avoid transferring oils.
- Maintain environmental controls, such as anti-static mats and air purifiers.
- Clean connectors regularly with specialized tools.
- Use alignment pins or guides during installation.
- Perform regular testing and maintain good cable management.
Note: Consistent cleaning and careful handling extend the lifespan of fiber optic connections and maintain optimal performance.
Physical Damage
Detecting Damage
Physical damage often results from bending stress, mechanical impacts, or misalignment. The Kevlar aramid protection inside the cable enhances tensile strength and resists stretching, pulling, and pressure. Technicians detect damage through visual inspection, cleaning, connector alignment checks, and re-seating connectors. Regular OTDR testing identifies issues such as misalignment or mechanical stress that may not be visible.
Repair or Replacement Steps
When technicians find physical damage, they should:
- Remove the affected cable section from service.
- Inspect connectors and fiber for visible signs of stress or breakage.
- Replace damaged connectors or cable segments with factory-tested parts.
- Test the new installation for insertion loss and continuity.
- Update documentation to reflect repairs.
Callout: Prompt detection and replacement of damaged cables prevent network outages and ensure long-term reliability.
MPO BREAKOUT HARNESS CABLE Installation Checklist
Pre-Installation Checks
Tools and Accessories Ready
A successful installation begins with thorough preparation. Technicians should follow these steps to ensure readiness:
- Confirm that the infrastructure is ready and all required materials and tools are available onsite.
- Clean and inspect MPO connectors using a microscope to prevent contamination and ensure proper alignment.
- Use alignment tools and standardized installation procedures to avoid misalignment.
- Organize cables with fan-out or breakout kits to protect fragile fibers by converting them into more robust buffered fibers.
- Attach pull eyes, either plastic or mesh, to facilitate safe cable pulling and protect connectors during installation.
- Control the installation environment to minimize contamination and physical damage.
- Prepare for post-installation testing, such as OTDR, to verify signal integrity and alignment.
Tip: Proper preparation reduces installation errors and protects sensitive fiber components from damage.
Cable Inspection Complete
Technicians must inspect each cable before installation. They should check for visible damage, verify connector cleanliness, and confirm that all specifications match project requirements. Early detection of issues prevents costly rework and ensures a smooth installation process.
Installation Steps
Routing and Connecting
Technicians route cables along planned pathways, avoiding sharp bends and high-traffic areas. They secure cables with ties and split nuts, maintaining the recommended bend radius. During connection, they align connectors using manufacturer-provided pins or guides. Each connector must seat firmly without excessive force. Proper routing and connection techniques protect fibers and maintain optimal signal transmission.
Testing and Verification
After connecting, technicians perform comprehensive testing. They measure insertion loss for each fiber using compatible test equipment and reference methods. OTDR testing detects loss and reflectance issues, while polarity and continuity checks confirm correct fiber mapping. Technicians clean connectors and inspect alignment to prevent signal degradation.
Callout: Testing and verification ensure that the installation meets performance standards and supports reliable network operation.
Post-Installation Review
Documentation
Accurate documentation supports future maintenance and troubleshooting. Technicians record test results for all fibers, including insertion loss, OTDR traces, and polarity verification. They update network diagrams and label cables clearly. Detailed records provide a complete performance history.
Maintenance Scheduling
Regular maintenance preserves network reliability. Technicians schedule routine cleaning and inspection of connectors. They re-seat connectors gently to correct misalignment and use diagnostic tests to detect faults early. Clean working environments and proper storage protect connectors from dirt and moisture.
| Post-Installation Review Aspect | Description |
|---|---|
| Cleaning and Inspection | Clean MPO connectors thoroughly and inspect the entire ferrule for contamination. |
| Insertion Loss Testing | Use appropriate reference methods and MPO-compatible test equipment to measure loss for each fiber. |
| OTDR Testing | Employ launch and receive cables with OTDR and breakout cables to detect loss and reflectance issues. |
| Polarity and Continuity Verification | Confirm correct fiber polarity and continuity across all fibers. |
| Documentation | Record all test results for future reference and maintenance. |
| Connector Alignment and Contamination | Ensure connectors are aligned and free from dirt to avoid signal degradation. |
| Use of Specialized Equipment | Use MPO-specific test sets and microscopes for accurate testing and inspection. |
Precise installation remains essential for network reliability and long-term performance. Technicians who follow a comprehensive checklist gain several advantages:
- Pre-installation planning reduces errors and anticipates challenges.
- Standardized procedures and quality tools improve efficiency.
- Proper cable management and documentation simplify maintenance and troubleshooting.
- Post-installation testing verifies signal integrity and alignment.
By using the checklist for every project, teams ensure optimal results and minimize downtime. Consistent best practices support scalable, high-performing networks.
FAQ
What is the recommended minimum bend radius for MPO breakout harness cables?
Manufacturers typically recommend a minimum bend radius of 20 to 30 times the cable diameter. Following this guideline helps prevent microfractures and signal loss during installation and operation.
How often should technicians clean MPO connectors?
Technicians should clean MPO connectors before every installation, after any disconnection, and during routine maintenance. Clean connectors ensure optimal signal transmission and reduce network downtime.
Can a single MPO breakout harness cable support both single-mode and multimode fibers?
No, a single MPO breakout harness cable cannot support both fiber types. Each cable is designed for either single-mode or multimode fibers. Mixing types can cause significant performance issues.
What tools are essential for proper MPO breakout harness cable installation?
Essential tools include fiber strippers, cleavers, crimping pliers, cleaning kits, and cable management accessories. Using the correct tools ensures precise installation and long-term reliability.
How do technicians verify correct polarity in MPO installations?
Technicians use polarity testers and follow manufacturer documentation. Proper labeling and visual inspection also help confirm correct fiber mapping and prevent data transmission errors.
What are the signs that an MPO breakout harness cable needs replacement?
Common signs include visible abrasions, bent connectors, increased insertion loss, and frequent connection instability. Regular inspections help identify cables that require replacement before failures occur.
Are MPO breakout harness cables suitable for outdoor installations?
Most MPO breakout harness cables are designed for indoor use. For outdoor environments, technicians should select cables with appropriate weatherproofing, UV resistance, and ruggedized jackets.